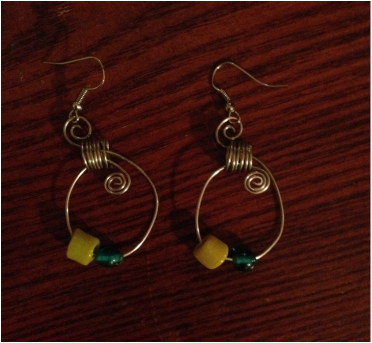
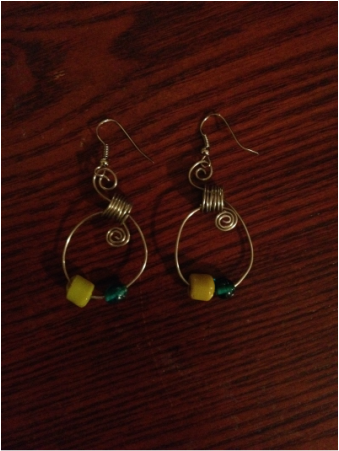
Silver Wire Spiral Earrings with Beads
To construct the spiral earrings the following tools are needed: ruler, 22 gauge nickel silver wire, wire cutters, needle nose pliers, ready made earring inserts (2), a cylindrical shaped object, and a thin object to create the coil.
For this design, since we are constructing earrings, everything should be done in pairs. First start off by cutting two exact lengths of wire that is 6 inches long. Next, make the coil for each earring. Using a thin object, such as a screw driver, take the wire and tightly wrap it around the screw driver with about 8 loops around the screw driver and leaving a little bit of excess. After creating the ideal amount of loops, pack it down against the ledge of the handle of the object and cut off the excess. Next, create another coil for the other earring following the same procedure.
After creating the coil, next take the 6 inches of wire and establish a curve against the cylindrical object in order to prevent kinks. Now start the inner spiral. This is done using the same technique that is used in the Egyptian link. Do these steps on the other length of wire. After this, attach the coil and the beads to the wire.
Next, bend the wire up and around and insert the wire into the coil. Then begin to pull the wire through and take the flat nose and create a spiral that is based on the s- linked curve. This curve is not wrapped around the pliers; it is floating and spirals out. Have one full spiral and continue until the center faces down. After doing this, complete the inner spiral that is based on the Egyptian link by doing 2 complete turns. Do these steps for the other length of wire to complete the earring set. Lastly, add the ready-made earring hook inserts and they are ready to wear!